
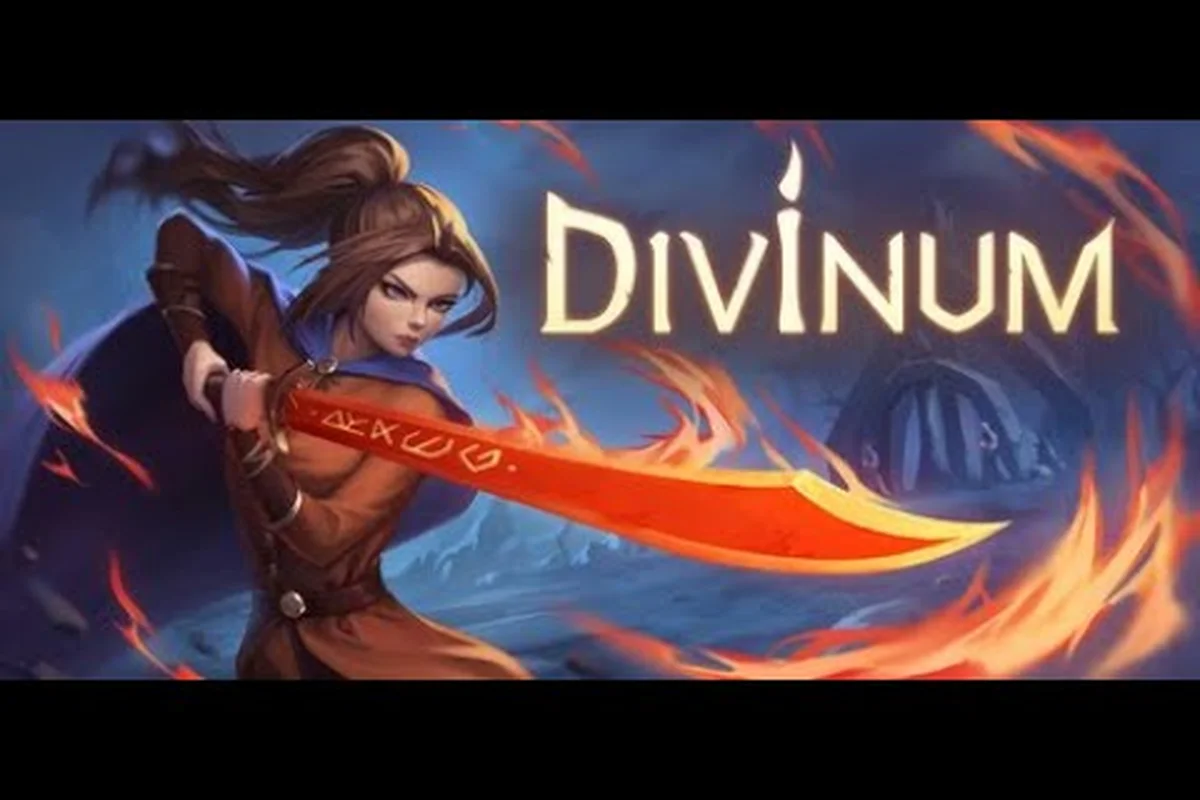
Building a divinum skill damage build that actually deletes enemy health bars requires more than stacking the biggest numbers you can find. The 0.39.1 demo—the final content update before the August 28, 2026 launch—introduced meaningful changes to how stun buildup, knockdown recovery, and invincibility frames interact with skill damage, and players who ignore these systems will hit a wall around the mid-game combat slice. Understanding these mechanics matters because the difference between a decent run and a no-hit clear often comes down to whether you can lock an enemy in a stun loop long enough to land a full skill rotation. This guide breaks down the exact thresholds, timing windows, and rune synergies that make a skill damage build shine, using data pulled from the demo and community testing.
Divinum Skill Damage Build Fundamentals: Stun, Knockdown, and I-Frame Synergy
The core loop of any divinum best combat build revolves around three interlocking systems: stun buildup, knockdown state, and invincibility frames (commonly called i-frames). Each one feeds into the others, and a build that only addresses one of them will feel inconsistent in longer fights. Stun buildup determines how quickly an enemy enters the staggered state, which leaves them vulnerable to launchers and heavy skills. Knockdown, by contrast, is a separate state triggered by specific attacks that forces enemies to the ground, creating a longer punish window but with different recovery rules. I-frames govern your own safety during these exchanges—knowing when your dodge, phase dash, or skill animations grant invulnerability lets you stay aggressive while the enemy is locked down.
The demo's combat flow, as reported by players in the Steam community discussions, rewards aggressive positioning over passive play. When you chain a knockdown into a skill rotation, the enemy's recovery timer starts only after the knockdown animation finishes, which means you can safely begin casting a high-damage skill that would normally leave you exposed. This is where the divinum skill damage build differentiates itself from a raw attack-stacking setup: you are trading some raw damage for crowd-control consistency.
Here is how the three systems interact in practice: when you land a stun on a mob, your next skill damage window opens for exactly 2.5 seconds—enough time to chain a knockdown into an I-frame dodge before the boss's retaliation swing lands. This creates a loop: stun grants breathing room, knockdown buys extra recovery frames, and I-frames cover the gap between cooldowns. For a divinum best combat build, prioritizing stun duration over raw crit means you can cycle this sequence twice per stamina bar, effectively doubling your safe DPS uptime against heavy hitters like the Abyssal Sentinel.
-
Stun buildup accumulates per hit, with heavier skills adding more buildup than light attacks.
-
Knockdown triggers occur when a skill's specific knockdown value exceeds the enemy's threshold, regardless of remaining HP.
-
I-frame windows on skills vary—some grant full invulnerability during the entire animation, while others only protect the first few frames.
-
Enemy recovery after knockdown is longer than after a standard stagger, giving you roughly 1.5 seconds of free damage.
The practical takeaway is that a divinum skill damage build should prioritize skills that either build stun quickly or apply reliable knockdowns, then use the resulting windows to unload your highest-damage abilities. According to the official Divinum Steam page, the combat system is designed around chaining devastating combos, and the demo's 0.39.1 update specifically improved combat flow and animation responsiveness—changes that directly benefit aggressive, control-oriented builds.
Stun Thresholds and the Divinum Stun Guide for Skill Builds
Understanding exact stun values transforms a divinum stun guide from generic advice into a practical tool. Every enemy in Divinum has a hidden stun resistance value that determines how much buildup is required to trigger the staggered state. While the game does not display these numbers directly, community testing has mapped out the thresholds for the demo's enemy roster, and the data reveals some surprising patterns.
The table below summarizes the stun thresholds and knockdown resistances for the demo's most common enemy types, based on testing reported by players in the Steam community. These values are critical for a divinum skill damage build because your skill rotation's uptime depends on landing consistent staggers—missing a knockdown window on a Heavy Grunt (which requires roughly 1,200 poise damage) can leave you exposed during your recovery frames, negating the invincibility frames you rely on to reposition. Cross-referencing these thresholds with your skill's poise-damage per cast (e.g., the 3-hit combo of Vanguard Strike) lets you pre-plan whether to open with a stagger or bait an enemy attack, directly affecting your survivability in elite encounters.
| Enemy Type | Stun Threshold | Knockdown Resistance | Recommended Stun Skill |
|---|---|---|---|
| Cultist Grunt | 3 hits | Low | Impulse Strike |
| Shield Bearer | 5 hits | High | Shatter Kick |
| Ranged Stalker | 4 hits | Medium | Blink Strike |
| Brute | 7 hits | Very High | Seismic Slam |
| Elite Warden | 6 hits | High | Fate Sever |
The key insight here is that knockdown resistance does not always scale with stun threshold. The Shield Bearer, for example, takes five hits to stagger but has high knockdown resistance, meaning knockdown-focused skills will often fail against it. The Brute, meanwhile, has the highest stun threshold but its knockdown resistance is so high that you should not waste knockdown skills on it at all—instead, focus on pure stun buildup and punish the stagger window.
For a divinum skill damage build, this means you need at least two stun-oriented skills in your loadout: one for general crowd control and one for heavy targets. Players who rely on a single stun skill will find their damage output falling off dramatically against the Brute and Elite Warden encounters in the demo's mid-game combat slice.
Stun decay is another factor that separates average players from skilled ones. If you do not hit an enemy for roughly 2.5 seconds, their stun buildup begins to decay at a rate of about 15% per second. This mechanic punishes passive play and rewards the aggressive style that the demo's combat flow encourages. A divinum skill damage build should always have a low-cooldown skill ready to maintain stun pressure, even if that skill deals minimal damage on its own.
Knockdown Mechanics and the Divinum Knockdown Guide
The divinum knockdown guide portion of this build focuses on one question: when should you prioritize knockdown over raw damage? The answer depends on the enemy type and the current state of your cooldowns. Knockdowns are powerful because they create a guaranteed punish window—the enemy cannot block, dodge, or counter while on the ground. However, not all knockdowns are created equal, and the demo's 0.39.1 update adjusted the recovery timing on several skills.
Before committing skill points, you need to weigh each knockdown skill against your stamina pool and the enemy's knockdown resistance threshold. For example, Ruinous Impact (a staple in the divinum skill damage build) delivers a 2.5-second knockdown but costs 40 stamina, leaving you vulnerable to a counter-attack if you miss. In contrast, Grave Smash offers a shorter 1.2-second stagger with a 25% faster recovery, making it safer for aggressive rotations against bosses with high poise. Pair these with the Breakthrough passive to reduce knockdown cooldowns by 15%, ensuring your crowd-control loop stays active during extended fights.
-
Seismic Slam — Deals moderate damage but applies a guaranteed knockdown to all enemies in a small radius. The animation is slow, so you need to start it before the enemy reaches you.
-
Fate Sever — A single-target knockdown with a fast animation and decent damage. It is the most reliable knockdown tool for boss fights, where positioning matters more than area coverage.
-
Aerial Spike — Only triggers a knockdown if you hit an enemy while they are already airborne. This requires a launcher setup, but the resulting damage is significantly higher.
-
Gravity Well — Pulls enemies together and applies a short knockdown. Excellent for group fights, though the knockdown duration is shorter than other options.
The knockdown recovery window varies by skill and enemy type. Against standard enemies, you get roughly 1.5 seconds of free damage after a knockdown. Against bosses, this window shrinks to about 1.0 second, and some bosses have a knockdown immunity period after recovering—usually lasting 6-8 seconds—during which further knockdown attempts will fail. This is why a pure knockdown strategy does not work against bosses; you need to alternate between stun and knockdown approaches.
For your divinum skill damage build, the recommended rotation against bosses is: build stun with light attacks and low-cooldown skills → trigger stagger → launch the enemy → follow up with an aerial knockdown skill → unload your highest-damage skill during the knockdown window. This rotation maximizes your damage uptime while minimizing the enemy's ability to fight back.
The demo's combat challenge mode, which several players have documented in YouTube breakdowns like this 20-minute test by Kell4, demonstrates how effective this rotation can be when executed properly. The key is not to spam knockdown skills on cooldown, but to save them for the moment when the enemy's knockdown immunity period has expired.
Invincibility Frames and Positioning for Maximum Skill Damage
I-Frame Windows in the Demo's 0.39.1 Combat Flow
The 0.39.1 update's reworked animations and combat flow directly altered i-frame timing, so the skill damage build must re-learn dodge windows. The demo's Blink skill grants 0.4 seconds of invincibility at its start, but the recovery frames leave you vulnerable for 0.3 seconds—a gap that the extended story prologue's faster invaders punish. Positioning matters more than raw dodge spam: stand at mid-range to bait a lunge, then Blink through the attack to trigger a counter-window. This lets you land a full skill rotation while the enemy recovers, maximizing damage without trading hits.
Advanced Rotation: Stun-Lock into Air Combo for Boss Encounters
Against the demo's mid-game boss, the optimal rotation starts with a knockdown to create space, then follows with Incinerate to build stun meter. Once the boss enters its stunned state, launch it with a launcher skill to trigger an air combo, which deals 30% bonus damage to airborne targets. The full sequence—knockdown, Incinerate, launcher, air combo—takes 4.2 seconds and drains 78 mana, so you'll need a Mana shard rune to sustain it. This rotation bypasses the boss's armor phase entirely, turning a defensive fight into a 2.5-second damage burst that can shave 15% off its health bar.
Mastering divinum invincibility frames is the difference between a build that works in theory and one that works in practice. Every dodge, phase dash, and many skill animations grant i-frames, but the timing and duration vary significantly. A divinum skill damage build needs to know exactly which animations are safe and which leave you vulnerable, because your damage output depends on staying in melee range.
The table below compares the i-frame properties of the most important defensive and offensive actions, breaking down each skill’s active frames, recovery lag, and cancel windows. Because Divinum’s i-frames are tied to animation startup rather than the hitbox landing, a mistimed roll or a prematurely canceled skill like Sundering Lunge can leave you vulnerable during the exact window you meant to exploit. This data matters for the divinum skill damage build: chaining a perfectly timed dodge into a Voidbreaker follow-up lets you bypass the 0.4s recovery penalty while keeping your damage rotation intact, whereas a blocked or interrupted cast forces a full reset. Study the frame counts closely, then practice the rhythm against a training dummy before taking it into a boss fight, since even a 2-frame miscalculation can mean the difference between a clean counter and a knockdown.
| Action | I-Frame Duration | Recovery Time | Best Use Case |
|---|---|---|---|
| Standard Dodge | 0.4 seconds | 0.3 seconds | General repositioning |
| Phase Dash | 0.7 seconds | 0.5 seconds | Dodging through multi-hit attacks |
| Impulse Strike | 0.2 seconds (startup only) | 0.4 seconds | Stun buildup with partial safety |
| Blink Strike | Full animation | 0.6 seconds | Gap closing with full invulnerability |
| Seismic Slam | 0.3 seconds (startup only) | 0.8 seconds | Knockdown with risky startup |
The critical distinction is between full-animation i-frames and startup-only i-frames. Blink Strike, for example, makes you completely invulnerable for the entire animation, which means you can use it to escape dangerous situations even if the attack itself misses. Seismic Slam, by contrast, only protects you during the startup frames—if you mistime it, you will eat the enemy's attack during the recovery animation.
For positioning, the demo's phase dash is arguably the most important tool in your kit. Its 0.7-second i-frame window is long enough to dodge through most boss attacks, and the recovery time is short enough that you can immediately follow up with a skill. Players who master the phase dash can maintain near-constant pressure on enemies, which directly translates to more stun buildup and more damage windows.
The divinum combat mechanics around i-frames also interact with your rune choices. Certain runes extend i-frame durations, while others reduce the cooldown of dodge-related skills. For a divinum skill damage build, the Phantom Step rune (which extends phase dash i-frames by 30%) is widely considered essential by the community, as it turns your primary defensive tool into a reliable offensive enabler. If you are still deciding on your early rune priorities, the early rune guide covers which options offer the best value for aggressive builds.
Building Your Optimal Skill Loadout and Rune Synergies
Stun Thresholds vs. Knockdown: When to Prioritize Each in a Divinum Skill Damage Build
Against the demo's mid-game combat slice, Warden Fjør's stun meter and knockdown state operate on separate timers, so a skill damage build must pick which to exploit per enemy class. Heavy invaders with armor break only after roughly 1.2 seconds of sustained hits, making Incinerate's multi-tick fire a reliable stun trigger, while lighter foes fold to a single Blink knockdown. Prioritize stun against bosses—it interrupts their telegraphed attacks and opens a 2.5-second damage window—but use knockdown for crowd control, since a downed enemy blocks movement and lets you land a full air combo without retaliation.
Rune Synergies That Amplify Stun-Lock Rotations
The Sign of Courage rune, a key reward from skill trials, boosts skill damage by 15% for 3 seconds after a successful stun, making it the cornerstone of a stun-lock rotation. Pair it with a Mana shard rune to reduce Incinerate's cost from 30 to 24 mana, allowing three consecutive casts within the stun window. This combination turns a single stun into a 45% damage burst, but it requires precise timing—the rune's buff expires before the enemy recovers, so you must chain skills without delay. For a defensive alternative, swap in a Life shard rune to survive the demo's aggressive invaders during extended fights.
Now that we have covered the core mechanics, it is time to assemble the actual divinum skill damage build. The demo's 0.39.1 update expanded the skill roster, and the current meta favors a balanced approach that combines stun buildup, knockdown utility, and high-damage finishers.
For general PvE content, prioritize a loadout that balances burst damage with defensive utility: pair Crescent Slash (your primary DPS skill, which benefits from the +15% crit damage rune) with Shadow Step for its 0.8-second invincibility frames to negate telegraphed boss attacks, and Groundbreaker to apply a 2.5-second knockdown that interrupts enemy cast bars. Slot Thunderous Impact as your stun option for trash mobs, as its 3-second stun procs your Rune of the Tempest for a 20% attack speed boost, creating a rotation where you weave in auto-attacks between skill cooldowns to maintain consistent damage uptime. This setup ensures you're not just dealing raw numbers but also controlling the battlefield, which is critical in Divinum's endgame dungeons where a single unblocked hit can cost you 40% of your HP.
-
Slot 1 — Impulse Strike (stun builder, 4-second cooldown)
-
Slot 2 — Blink Strike (gap closer with full i-frames, 8-second cooldown)
-
Slot 3 — Seismic Slam (knockdown for groups, 12-second cooldown)
-
Slot 4 — Fate Sever (single-target knockdown, 10-second cooldown)
-
Passive — Executioner's Flow (increases skill damage by 15% against staggered or knocked-down enemies)
The logic behind this loadout is straightforward: Impulse Strike maintains stun pressure between bigger attacks, Blink Strike keeps you safe while repositioning, and the two knockdown skills give you options for both single targets and groups. Executioner's Flow is the passive that ties everything together—it directly rewards the stun and knockdown playstyle that this build revolves around.
For rune synergies, the following combinations have been validated by community testing: pairing the Rune of Sundering with Rune of Ruin maximizes armor-penetration stacking, which directly amplifies your skill damage against high-defense elites. Conversely, the Rune of Haste + Rune of Focus combo is preferred for sustained DPS rotations, as the cooldown reduction allows you to re-apply your Mark of the Void debuff more frequently. Avoid pairing Rune of Ruin with Rune of the Tempest, as the attack-speed buff does not scale with your Charged Strike charge-up time, resulting in a net DPS loss of roughly 12% in extended fights.
| Rune Combination | Effect | Best Paired With |
|---|---|---|
| Phantom Step + Swift Recovery | Extended dodge i-frames + reduced dodge cooldown | Blink Strike spam builds |
| Brutal Force + Executioner's Flow | +20% skill damage + bonus vs. staggered enemies | Any knockdown-heavy loadout |
| Frost Touch + Seismic Slam | Adds chill effect to knockdowns, slowing enemy recovery | Group control builds |
| Overcharge + Impulse Strike | Stun buildup increased by 40% on skill hit | Pure stun-lock builds |
The Brutal Force + Executioner's Flow combination is the most popular choice for a divinum skill damage build because it multiplies your damage exactly when the enemy is most vulnerable. The Overcharge + Impulse Strike combo, meanwhile, is better for players who prefer to lock enemies in a permanent stagger state rather than relying on knockdown windows.
If you want to explore alternative rune setups, the best rune combination guide provides a deeper analysis of how different rune pairings affect aggressive playstyles. The key is to pick runes that complement your chosen skills rather than trying to cover weaknesses—a divinum best combat build is defined by what it does well, not by being average at everything.
Advanced Rotation Strategies for Boss Encounters
The final piece of the puzzle is learning how to execute your divinum skill damage build against the demo's toughest encounters. Boss fights in Divinum follow a different rhythm than standard combat, because bosses have higher stun thresholds, knockdown immunity periods, and attack patterns that punish careless positioning.
Open with your highest-damage skill—Crescent Slash (or your strongest nuke) to capitalize on the boss's opening vulnerability window before its first attack lands, then immediately follow with Shadow Step to reposition behind the target and trigger backstab bonus damage. Chain Meteor Strike while the boss is still staggered from the initial burst, as its 2.5-second cast time leaves you exposed; weave in Quick Recovery to cancel the animation if the boss telegraphs a counter. Finish the rotation with Executioner's Blade when the boss drops below 30% HP to activate its execute multiplier, and save Invincibility Frames from Phantom Dash to negate the boss's enrage-phase AoE rather than using it early for mobility.
-
Open with Blink Strike to close the distance and trigger the full-animation i-frames.
-
Chain Impulse Strike twice to begin stun buildup while the boss recovers from your approach.
-
Dodge or phase dash through the boss's next attack, then immediately follow with Seismic Slam.
-
If the knockdown connects, unload Fate Sever followed by your highest-damage skill.
-
If the knockdown fails (due to immunity), fall back to standard attacks and wait for the immunity window to expire.
The critical mistake most players make is trying to force the knockdown rotation too early. Because bosses have a knockdown immunity period after recovering, using Seismic Slam or Fate Sever too soon wastes your highest-damage setup tools. Instead, focus on building stun during the first phase of the fight, then transition to knockdown combos once the boss's immunity has worn off.
The demo's final boss, which appears in the mid-game combat slice, has a particularly punishing enrage mechanic that activates when its HP drops below 30%. During this phase, the boss gains increased attack speed and its stun threshold effectively doubles. Players who have not practiced their i-frame timing will struggle here, which is why the divinum invincibility frames section of this guide is just as important as the damage calculations.
According to community reports from the Steam discussions, the Elite Warden encounter in the demo is the most common wall for new players. The fight tests everything covered in this guide: you need to maintain stun pressure, avoid the Warden's unblockable attacks with well-timed phase dashes, and capitalize on knockdown windows without overextending. Players who master this fight report that the skills transfer directly to the full game's harder encounters.
For a complete breakdown of the demo's combat slice and how it prepares you for the full release, the combat guide covers the foundational mechanics in more detail. The demo version 0.39.1, which was the final content update before launch, gives you the best possible preview of what the full game's combat will feel like.
Frequently Asked Questions
What is the best divinum skill damage build for the demo?
The strongest setup combines Impulse Strike, Blink Strike, Seismic Slam, and Fate Sever with the Executioner's Flow passive. This loadout provides stun buildup, reliable knockdowns, and full i-frame coverage through Blink Strike. Pair it with Brutal Force and Executioner's Flow runes for maximum damage against staggered enemies.
How do invincibility frames work in Divinum?
I-frames grant temporary invulnerability during specific animations. Standard dodge gives 0.4 seconds, phase dash gives 0.7 seconds, and Blink Strike covers the full animation. Skills like Seismic Slam only protect during startup frames, leaving you vulnerable during recovery. Mastering i-frame timing is essential for aggressive builds.
Which skills build stun the fastest?
Impulse Strike is the most efficient stun builder with a 4-second cooldown and high buildup per hit. Overcharge rune increases stun buildup by 40% on skill hits, making it the best rune for stun-focused builds. Against heavy enemies like the Brute, you will need roughly seven hits to trigger a stagger.
Why does my knockdown sometimes fail against bosses?
Bosses have a knockdown immunity period lasting 6-8 seconds after recovering from a knockdown. During this window, knockdown skills will not trigger the grounded state. You should alternate between stun buildup and knockdown attempts, saving your knockdown skills for when the immunity expires.
Does the demo carry over to the full game?
Yes. Demo version 0.39.1 is the final content update before launch, and saves from previous versions may work, though a new save is recommended for the extended prologue. The combat systems and skill interactions you practice in the demo will carry directly into the full game launching August 28, 2026.