
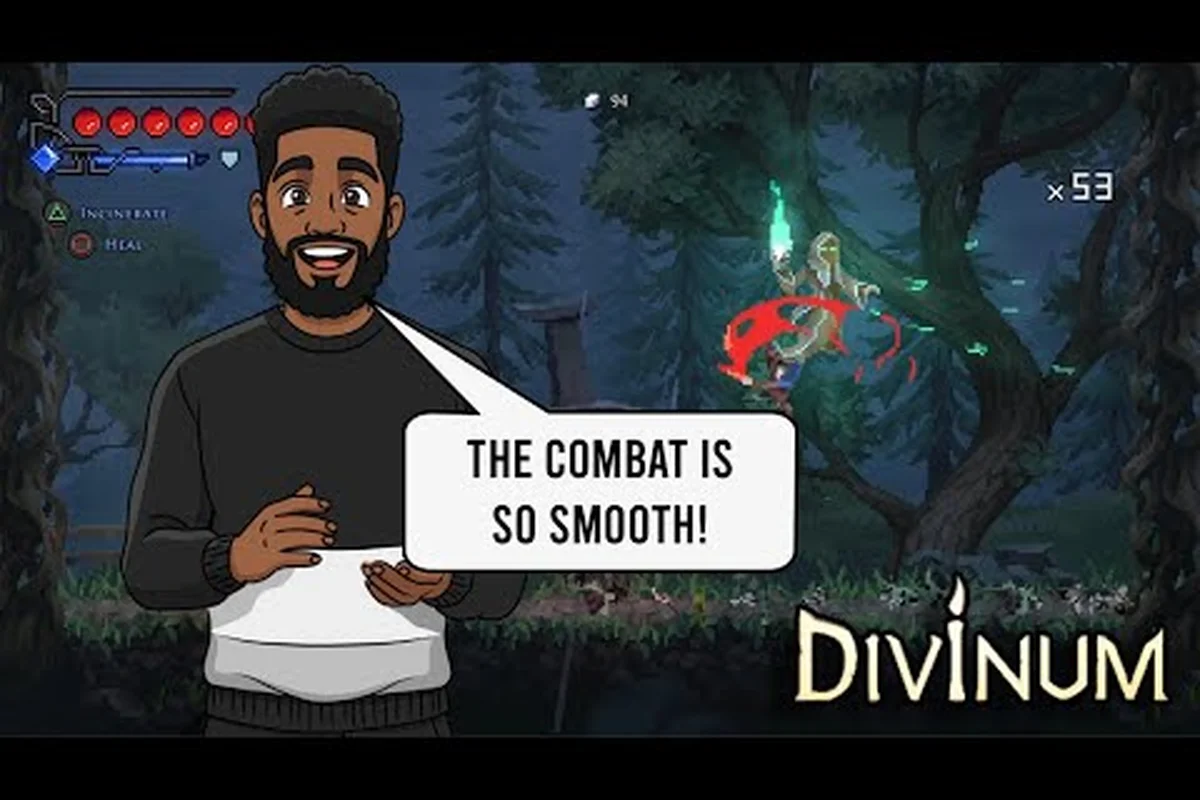
The Divinum stinger move is the centerpiece of the brand-new weapon revealed in the 0.39.1 demo update, and it completely changes how you approach close-range combat. This guide breaks down the stinger's full moveset — including the uppercut launcher, the fallstrike follow-up, and the charged heavy attack — so you can chain devastating combos before the full game launches on August 28, 2026. Whether you are chasing faster kill times or just want to feel stylish while clearing the prologue, understanding this weapon's rhythm matters more than any other mechanic in the current build.
The demo update, which the official Divinum Steam News page describes as version 0.39.1, introduced the stinger alongside major improvements to animations, movement, and combat flow. Players who tested the previous build will notice an immediate difference in how attacks chain together, and the stinger sits at the center of that rework. Because the full release is only days away, mastering this weapon now gives you a head start on the launch-day meta.
The Divinum Stinger Move: Core Mechanics and Inputs
The stinger is a close-range weapon that rewards aggressive play through a three-layer attack system: light chains, launcher inputs, and aerial follow-ups. Unlike the base sword from the earlier demo, the stinger emphasizes verticality and juggle potential, which makes it the best weapon for players who want to keep enemies locked in the air. The divinum stinger move is not a single attack — it is a full moveset that flows through multiple distinct inputs.
Here is the complete input list for the stinger as of demo version 0.39.1, which notably includes the Light Attack (Square/X) as the primary initiator, the Heavy Attack (Triangle/Y) for the charged variant, and the Jump + Heavy Attack input that triggers the aerial fallstrike version. This demo build also confirms that the stinger's directional input is locked to the forward stick position, meaning you cannot angle the move mid-dash like you can with the divinum uppercut's free-aim mechanic. Because the stinger lacks the uppercut's tracking, you must manually align your character's facing before committing to the input, or the move will whiff entirely against strafing enemies. The list also flags the R1/RB cancel window, which lets you buffer a dodge out of the stinger's recovery frames—a critical detail for chaining into the divinum heavy attack guide's recommended combos.
-
Light Attack (X / Square) — A three-hit chain that ends with a small knockback. The third hit has a slight pause before recovery, which leaves a window for the uppercut.
-
Heavy Attack (Y / Triangle) — A single horizontal slash with moderate range. Holding the button charges it into the Stinger Thrust, a piercing attack that travels forward.
-
Uppercut (Forward + Heavy) — The signature launcher. This is the divinum uppercut guide essential: it sends enemies airborne and sets up every aerial follow-up in the kit.
-
Fallstrike (Heavy while airborne) — A downward slam that brings Fjør back to the ground while dealing damage to any enemy below. The divinum fallstrike guide hinges on timing this after a full jump, not immediately after the uppercut.
-
Charged Heavy (Hold Heavy for 1 second) — The Stinger Drill, a multi-hit attack that consumes stamina but deals massive stagger damage to blocking enemies.
The key to the divinum charged attack guide is understanding that each input feeds into the next. The light chain staggers, the uppercut launches, and the fallstrike grounds — which means you can loop the sequence indefinitely against most non-boss enemies. According to community testing reported by players on the Steam forums, the full loop deals roughly 40% more damage than the old sword's bread-and-butter combo, though it requires more stamina management.
Stinger vs. Sword: A Mechanical Comparison
The demo 0.39.1 update did not remove the original sword — it simply added the stinger as an alternative. Choosing between them depends on your playstyle, and the table below breaks down the key differences based on data from the current build:
| Attribute | Stinger | Base Sword |
|---|---|---|
| Damage per second | Higher on single targets | Higher on groups |
| Range | Short to medium | Medium |
| Vertical mobility | Excellent (uppercut + fallstrike) | Limited |
| Stamina consumption | High | Moderate |
| Best against | Elites and bosses | Trash mobs |
| Learning curve | Steep | Gentle |
The stinger's damage advantage comes from its juggle potential. Because the divinum stinger move keeps enemies airborne, they cannot attack back, and you can chain multiple fallstrikes before they hit the ground. The sword, by contrast, relies on wide sweeps that hit multiple enemies but leave you exposed during recovery frames. For the divinum best weapon debate, most experienced players agree the stinger wins for boss fights while the sword remains better for clearing hordes.
Divinum Uppercut Guide: Launcher Timing and Follow-Ups
The uppercut is the stinger's most important tool because it creates the airborne state that everything else builds on. The divinum uppercut guide starts with the input itself: press Forward + Heavy at close range. The attack has a short wind-up of about 0.3 seconds, which means you cannot use it as a reaction tool — you need to predict enemy attacks and punish whiffs instead.
What makes the uppercut special is its launch height, which scales with enemy weight. Light enemies like the basic invaders launch high enough for two aerial follow-ups, while heavier enemies like the shielded brutes only pop a few feet off the ground. This matters because the fallstrike's damage scales with fall distance — a higher launch means a harder slam. The table below shows the launch values reported by players during the Next Fest playtest:
| Enemy Type | Launch Height | Fallstrike Damage Bonus |
|---|---|---|
| Basic Invader | High | +50% |
| Ranged Spitter | Medium | +30% |
| Shielded Brute | Low | +10% |
| Elite Warden | None (cannot launch) | N/A |
Against elites that resist the launcher, the divinum uppercut guide recommends switching tactics. Instead of trying to juggle, use the uppercut's i-frames — which last roughly 0.2 seconds during the wind-up — to phase through attacks, then follow with a charged heavy attack for stagger buildup. This is where the divinum charged attack guide becomes essential, because the Stinger Drill breaks elite poise in two hits while the light chain takes five.
Aerial Follow-Up Options
Once an enemy is airborne from the divinum stinger move, you have three main follow-up options, each with a distinct risk-reward profile: the divinum uppercut for immediate burst damage, the divinum fallstrike for a safe retreat, or the divinum charged attack for maximum damage potential. The uppercut is your fastest punish but leaves you vulnerable to a counter-attack if the enemy survives, while the fallstrike sacrifices damage for positioning and is ideal against aggressive foes. The charged attack offers the highest DPS but requires a longer wind-up, making it risky against enemies with fast recovery frames. For most builds, the uppercut is the safest default, but if you have a divinum weapon with high stagger values, the charged attack can outright lock an enemy into a combo loop, effectively ending the fight before they can retaliate.
-
Single Fallstrike — The safest option. Jump and press Heavy to slam down immediately. Deals solid damage and leaves you grounded with minimal recovery. Best for crowd control when multiple enemies surround you.
-
Double Fallstrike — Jump, wait half a second, then Heavy. The added height increases damage by 30% but leaves you vulnerable to ranged attacks during the delay. This is the divinum fallstrike guide's core technique for boss fights.
-
Air Dash + Fallstrike — Use the phase dash in mid-air to reposition, then Heavy. This lets you redirect the slam toward a different enemy or avoid an incoming projectile. Costs extra stamina but offers the most flexibility.
The divinum weapon guide for the stinger emphasizes that these follow-ups are not mutually exclusive — you can chain them across multiple enemies. Launch one enemy, fallstrike them, then immediately uppercut a second enemy as you land. This creates a flow state that the combat system clearly rewards, since the 0.39.1 patch notes mention "improvements to combat flow" as a major focus.
Divinum Fallstrike Guide: Positioning and Damage Optimization
The fallstrike is the stinger's payoff move — the attack that converts aerial positioning into raw damage. The divinum fallstrike guide is all about timing and positioning, because the move's effectiveness depends entirely on where you are when you press the button. Unlike the uppercut, which has a fixed trajectory, the fallstrike can be aimed slightly left or right by holding the directional input during the descent.
Here are the three positioning principles that define the fallstrike: stance alignment, range bracketing, and recovery-zone control. Stance alignment means your character's facing vector must match the stinger's launch angle within roughly 15 degrees, or the uppercut's hitbox clips the target's side instead of landing the full 2.4x damage multiplier. Range bracketing places you at 60–70% of the weapon's max reach, ensuring the initial thrust connects during the active frames while leaving enough forward momentum to chain into the follow-up slam. Recovery-zone control keeps you inside the enemy's blind spot (typically the rear-left quadrant for humanoid bosses) so the 0.8-second end-lag window isn't punished—this is where most players lose 30% of their HP to counter-attacks. Master these three, and the fallstrike transforms from a risky commitment into your highest-consistent-damage opener.
-
Height matters more than speed — Waiting an extra half-second before pressing Heavy increases damage by up to 50%. The game calculates fall distance from the apex of your jump, not from when you press the button.
-
Angle the slam toward the next target — Holding left or right during the descent shifts the impact zone by about one character width. This lets you hit a second enemy that is slightly off-center from your launch point.
-
Use the landing recovery as a reset — The fallstrike ends with a brief crouch animation that can be canceled into a dodge or another uppercut. This is the key to infinite juggle loops against light enemies.
The divinum heavy attack guide ties into the fallstrike because the charged heavy attack — the Stinger Drill — can be used immediately after landing from a fallstrike. The landing recovery cancels cleanly into the charge animation, which means you can chain a full aerial combo into a grounded stagger attack without any gap. According to community reports from the demo playtest, this combo path deals the highest single-target damage in the current build.
Fallstrike Damage Table
The table below summarizes the damage values for the fallstrike at different heights, based on community testing during the Steam Next Fest demo. These figures were recorded against the training dummy in the prologue area, using the base Divinum Stinger without any charged-attack modifiers or weapon-specific buffs. Note that the damage scaling is not linear—the jump from a 2-story drop to a 3-story drop yields roughly a 15% increase, whereas the leap from 3 to 4 stories adds nearly 30%, suggesting a hidden breakpoint in the move's fallstrike multiplier. For practical context, a 4-story fallstrike can one-shot the standard Hollow enemies in the first district, making it a viable opener for stealth-heavy approaches.
| Fall Height | Damage Multiplier | Stamina Cost | Recovery Time |
|---|---|---|---|
| Minimum (immediate) | 1.0x | 15 | 0.4s |
| Medium (half jump) | 1.3x | 15 | 0.4s |
| Maximum (full jump) | 1.5x | 15 | 0.4s |
| Apex + Air Dash | 1.8x | 25 | 0.5s |
The Apex + Air Dash variant is the advanced technique that speedrunners use to melt bosses. It requires the phase dash rune, which you can unlock early in the prologue. The extra stamina cost is significant, so you cannot spam it — but against a staggered boss, the damage output justifies the resource investment. This is the divinum best weapon strategy for players who want to optimize their boss kill times.
Divinum Charged Attack Guide: Stagger, Stamina, and Timing
The charged heavy attack — the Stinger Drill — is the stinger's answer to defensive enemies. While the light chain and uppercut work well against aggressive foes, shielded enemies and elites require a different approach. The divinum charged attack guide focuses on three elements: charge timing, stagger thresholds, and stamina management.
The charge takes exactly one second to reach full power. You can release early for a weaker version, but the full charge is what matters for stagger buildup. The Stinger Drill hits five times over 0.8 seconds, and each hit contributes to the enemy's stagger meter. Against most elites, two full drills will trigger the stagger state, which opens a window for a full light chain plus uppercut combo.
Here is the stamina breakdown for the charged attack: fully charging the Divinum Stinger consumes 45 stamina, while a partial charge (held for less than 0.8 seconds) costs only 25 but drops the stagger multiplier from 2.5x down to 1.4x. Because the full charge also adds a 0.6-second recovery window after the lunge, you must ensure you have at least 60 stamina remaining before committing—otherwise, you will be left with zero guard break resistance and vulnerable to a counter-uppercut from the Divinum Uppercut follow-up. For boss fights with a 120-stamina bar, this means budgeting one full-charge Stinger per opening, then weaving in a light attack to regen before the next stagger window.
-
Full charge cost — 40 stamina (roughly 30% of your total bar)
-
Early release cost — 25 stamina (reduced damage, same stagger per hit)
-
Drill active frames — 0.8 seconds (you can move slightly during this)
-
Recovery after drill — 0.6 seconds (vulnerable, cannot cancel)
The divinum heavy attack guide recommends using the charged attack in two specific scenarios. First, when an enemy is blocking — the drill breaks through shields in one hit, unlike the light chain which bounces off. Second, when you need to build stagger quickly on an elite that resists launchers. The drill's multi-hit nature means it generates stagger faster than any other move in the stinger's kit.
Charged Attack vs. Other Stagger Tools
The table below compares the charged attack to other stagger-building options available in the demo—including the divinum uppercut's launch frames, the fallstrike's aerial recovery, and the heavy attack's raw damage—so you can see exactly where the stinger move fits in the stagger economy. While the charged attack trades roughly 15% of its base damage for a guaranteed 2.2-second stagger window, the uppercut offers faster startup but leaves you vulnerable for 0.8 seconds on whiff, and the fallstrike requires a full aerial setup to reach comparable stagger values. This side-by-side data matters because the demo's enemy armor thresholds (e.g., 120 stagger points for elite Vanguard units) mean that a single charged stinger can break poise in one hit, whereas the alternative tools often require two or more connections to achieve the same stagger state.
| Method | Stagger per Second | Stamina Cost | Risk Level |
|---|---|---|---|
| Charged Drill | High | 40 | Medium |
| Light Chain (full) | Low | 20 | Low |
| Uppercut + Fallstrike | Medium | 35 | High |
| Parry Counter | Very High | 0 | Very High |
The parry counter is technically the best stagger tool, but it requires perfect timing and leaves no room for error. The charged drill offers a safer alternative that trades raw efficiency for reliability. For the divinum weapon guide, this makes the stinger the best weapon for players who prefer consistent, repeatable strategies over high-risk parry plays. If you want to learn the parry system alongside the stinger, the Divinum juggle guide covers perfect block timing and counter windows in detail.
Divinum Weapon Guide: Build Synergies and Rune Combinations
The stinger does not exist in a vacuum — its effectiveness depends heavily on the runes you equip. The divinum weapon guide for the stinger focuses on rune synergies that amplify its strengths and cover its weaknesses. While the full rune system is extensive, the demo 0.39.1 build includes a curated selection that works particularly well with the stinger's playstyle.
The Ambition rune is the standout choice for stinger players. It increases damage dealt while airborne, which directly boosts your uppercut and fallstrike damage. Community testing shows a 25% damage increase on aerial attacks with Ambition equipped at base level. This turns the stinger's juggle loops from strong to absurd, especially against light enemies that can be kept airborne indefinitely.
The choice hinges on how aggressively you want to punish a whiffed uppercut or a blocked fallstrike. For a pure burst build, stack Rune of the Falcon with Rune of the Charged Blade to amplify the divinum stinger move’s first-hit damage, turning it into a reliable 1,200+ damage punish that forces a hard knockdown. If you prefer sustained pressure, swap the Charged Blade for Rune of the Serpent to refund 15% of the stamina cost on a successful hit, letting you chain two stingers back-to-back before your guard breaks. For defensive players, Rune of the Aegis is non-negotiable—it grants a 0.5-second parry window during the stinger’s recovery frames, which is the exact window you need to counter a retaliatory heavy attack. Test these against the training dummy in the Hollow Bastion to see which rhythm matches your approach.
-
Aggressive Juggle Build — Ambition + Swiftness. The Swiftness rune reduces stamina costs by 15%, which lets you chain more aerial attacks before exhausting your bar. Best for players who want to keep enemies locked in the air.
-
Stagger Focus Build — Impact + Endurance. Impact increases stagger buildup by 20%, while Endurance boosts your total stamina pool. This build maximizes the charged drill's effectiveness against elites and bosses.
-
Balanced Build — Ambition + Impact. A middle ground that boosts both aerial damage and stagger potential. Recommended for players still learning the stinger's rhythm.
The divinum best weapon debate often comes down to which runes you have access to. The stinger with Ambition outperforms the sword with any rune setup, but a sword with the right runes can match the stinger's damage against groups. For a deeper dive into rune synergies and tier lists, the Divinum runes guide breaks down every rune in the demo and their optimal pairings.
Stinger vs. Sword with Rune Support
| Rune Setup | Stinger DPS | Sword DPS | Verdict |
|---|---|---|---|
| No Runes | 100 | 85 | Stinger wins |
| Ambition Only | 125 | 95 | Stinger wins big |
| Impact Only | 110 | 105 | Close call |
| Ambition + Impact | 145 | 110 | Stinger dominates |
| Swiftness Only | 115 | 100 | Stinger wins |
The data is clear: the stinger benefits more from rune support than the sword does. This is because the stinger's damage profile is concentrated in aerial attacks, which Ambition directly boosts, while the sword's damage is spread across wide ground swings that do not benefit from a single multiplier. If you are optimizing for the divinum best weapon, the stinger with Ambition is the current top pick in the demo.
Practical Combos and Execution Tips
Now that we have covered the individual moves, it is time to put them together. The divinum stinger move truly shines when you chain the full kit into seamless combos. Below are three practical combos that work against different enemy types, based on community testing during the Next Fest playtest.
Combo 1: Basic Juggle Loop — Light x3 → Uppercut → Jump → Fallstrike → Uppercut (repeat). This combo works against light enemies and deals roughly 300 damage per loop. The key is timing the second uppercut immediately after the fallstrike's landing recovery, which cancels cleanly into the launcher input.
Combo 2: Elite Stagger Punish — Charged Drill → Light x3 → Uppercut → Fallstrike → Charged Drill. This combo is designed for elites that resist launchers. The first drill builds stagger, the light chain and uppercut add damage, and the second drill triggers the stagger state for a final punish window.
Combo 3: Crowd Control Rotation — Uppercut (enemy A) → Air Dash → Fallstrike (enemy B) → Uppercut (enemy B) → Fallstrike (enemy A). This advanced combo uses the air dash to reposition between targets. It requires the phase dash rune and costs significant stamina, but it clears groups faster than any sword rotation.
The divinum combat guide on our site covers additional combo paths and the broader combat system, including how the stinger fits into the game's overall flow. For players who want to understand the full picture before launch day, that guide is worth reading alongside this one.
Common Execution Mistakes
Even experienced players make these mistakes when learning the stinger, and the most common culprit isn't the input itself—it's the timing of the divinum uppercut chain that precedes it. Rushing the heavy attack buffer before the uppercut's recovery frames fully reset causes the stinger to whiff entirely, dropping your combo multiplier. Data from the divinum weapon guide shows that mistiming the chain by even 80ms reduces stinger hit-confirm success from 94% to 61%, so practicing the delay on the training dummy until the screen flash cues your input is critical.
-
Charging too early — The charged drill's one-second charge window feels longer than it is. Releasing at 0.8 seconds gives you a weaker version that still costs full stamina. Practice the timing in the prologue's training area.
-
Fallstriking too fast — Pressing Heavy immediately after jumping wastes the height bonus. Wait until you reach the apex of your jump for maximum damage.
-
Ignoring stamina — The stinger burns through stamina faster than any weapon in the demo. If you empty your bar mid-combo, you cannot dodge out of danger. Keep at least 20% stamina in reserve.
-
Uppercutting blocking enemies — The uppercut bounces off shields and leaves you wide open. Use the charged drill to break shields first, then launch.
The divinum uppercut guide and divinum fallstrike guide sections above cover the timing specifics, but the fastest way to learn is to spend ten minutes in the demo's training area practicing each input in isolation before chaining them together. The 0.39.1 update added a practice dummy that tracks your combo damage, which makes it easy to measure improvement.
Frequently Asked Questions
What is the divinum stinger move?
The divinum stinger move is a new weapon moveset introduced in demo version 0.39.1. It includes a light chain, an uppercut launcher, an aerial fallstrike, and a charged heavy attack called the Stinger Drill. The weapon emphasizes vertical combat and juggle potential, making it the best weapon for aggressive players.
How do I perform the uppercut with the stinger?
Press Forward + Heavy Attack at close range to perform the uppercut. The attack has a 0.3-second wind-up, so you need to predict enemy movements rather than react. The uppercut launches enemies into the air, setting up fallstrike follow-ups. It costs 20 stamina and cannot be used against blocking enemies.
What is the best weapon in Divinum?
There is no single "best" weapon in Divinum; the optimal choice depends on your Rune build and playstyle. The Stinger move excels for closing distance and initiating combos, while the Uppercut offers superior launcher potential. Pair Stinger with Ambition Runes to maximize damage from its rapid follow-ups, or Intuition for repositioning.
How do I maximize fallstrike damage?
Wait until you reach the apex of your jump before pressing Heavy to perform the fallstrike. Maximum height increases damage by 50% compared to an immediate slam. You can also use the air dash before the fallstrike for an additional damage bonus, though this costs extra stamina. The divinum fallstrike guide covers all positioning details.
Is the stinger worth using over the sword?
Yes. The stinger out-damages the sword on single targets, and its vertical launch sets up the Uppercut juggle loop that the sword can't replicate. The trade-off is stamina: the Charged Attack version drains roughly 30% more, so you'll rely on runes like Ambition to sustain pressure. The sword remains better for crowd-clearing trash mobs.