
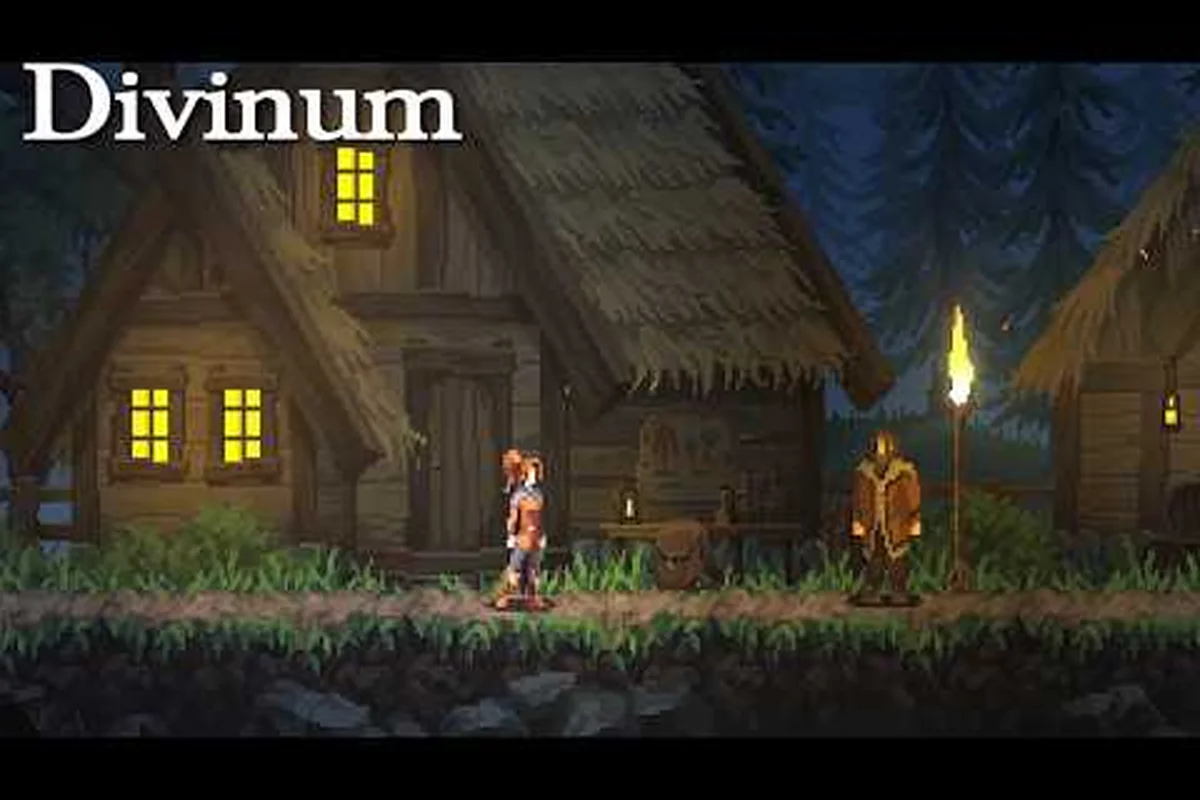
Dying in Divinum can send you back further than you expect if you don't understand how its checkpoint system works. Unlike many modern action games that auto-save every few steps, Divinum relies on a deliberate mix of active checkpoint altars and passive respawn anchors that reset enemy positions and restore your resources. This Divinum checkpoints guide breaks down exactly where those save points sit in the 0.39.1 demo, what carries over after death, and how to plan your exploration so you never lose more than a few minutes of progress. Because the demo was updated with an extended story prologue and improvements to movement and combat flow, knowing the current respawn layout matters more than ever before you dive into the full release on August 28, 2026.
Divinum Save System Explained: Core Mechanics
The save system in Divinum is a hybrid design that blends manual checkpoint activation with automatic respawn anchoring, which means you control when progress is locked in but the game decides where you wake up after a death. When you interact with a checkpoint altar, the game writes a save state that records your current health, Sanctite reserves, unlocked runes, and story flags, but it does not save your position on the map. Instead, you respawn at the nearest active anchor point to where you died, which is usually the last altar you touched or a special respawn node placed at the entrance of major combat arenas.
This distinction is critical because it changes how you approach risky sections. If you activate an altar at the start of a dungeon and then die halfway through, you return to that altar with enemies fully reset, which means you have to fight your way back to the spot where you fell. However, the game does keep any rune fragments and collectible items you picked up before dying, so you never lose permanent upgrades or key story items. According to community reports from the playtest, this system was designed to encourage careful resource management rather than punish exploration, and the 0.39.1 update refined the respawn timing to reduce loading delays.
How Checkpoint Activation Works
Activating a checkpoint is simple but requires intentionality. When you approach an altar, a prompt appears that lets you channel Sanctite into the stone, which triggers a brief animation and a soft chime that confirms the save. You cannot activate an altar while enemies are chasing you, so you need to clear the immediate area first. The game does not limit how many times you can use an altar, and there is no consumable cost for saving, which means you can safely save before every major encounter without worrying about resource depletion.
The table below summarizes the key differences between the two save mechanisms in the demo, and it’s worth studying before you commit to a run. The Auto-Checkpoint system snapshots your progress at fixed story beats—like clearing the prologue’s Abandoned Atrium or after the first Warden encounter—and overwrites your single slot automatically, which means you can’t backtrack to farm earlier Resonance Shards if you miss a pickup. Manual Saves, by contrast, let you create up to three distinct slots, so you can park a save right before the Divinum Gate boss to test different ability loadouts without risking your main file. That flexibility matters most in the mid game, where a single mis-timed Parry can cost you 20 minutes of progress.
| Save Mechanism | Trigger | What Is Saved | Respawn Location | Enemy Reset |
|---|---|---|---|---|
| Checkpoint Altar | Manual interaction | Health, Sanctite, runes, story flags, inventory | Last activated altar | Yes, full reset |
| Respawn Anchor | Automatic on entering arena | Health, Sanctite, inventory | Arena entrance | Yes, full reset |
| Quick Save | Not available in demo | N/A | N/A | N/A |
As of the 0.39.1 demo, there is no quick-save or manual save-file creation, so you cannot create multiple branching save states. The system is intentionally streamlined to keep you moving forward, and the developers confirmed on the official Divinum Steam page that this design carries into the full game, although they hinted at additional save options for the final release.
What Survives Death and What Resets
Understanding what carries over after death is the difference between a frustrating backtrack and a smooth recovery. The game separates permanent progression from temporary state, and knowing which category each resource falls into helps you make better decisions about when to push forward and when to retreat to safety.
-
Permanent progression: Rune unlocks, key story items, map exploration data, and any Sigil fragments you collect stay in your inventory after death, so you never have to redo major story beats or re-find hidden collectibles.
-
Temporary state: Your health bar resets to its current maximum, Sanctite reserves refill to a baseline amount, and consumable items like healing herbs and throwing knives are restored to their default counts, which means you cannot stockpile resources by farming and then dying.
-
Enemy respawns: All non-boss enemies respawn when you die, including minibosses in some cases, so you need to re-clear areas before reaching your previous position.
This system rewards players who learn enemy patterns and conserve resources, because dying does not erase your overall progress but does cost you time and force you to re-engage with combat encounters. The Divinum demo walkthrough covers the full progression path in more detail, including which sections are safe to rush through and which require careful checkpoint management.
Checkpoint Locations in the Prologue
The prologue section of the demo introduces you to the checkpoint system gradually, with three checkpoint altars placed at strategic intervals that teach you the rhythm of save-and-explore. The first altar appears right after the opening cutscene, which means you can save immediately before encountering your first enemies. This is a deliberate design choice because the tutorial area teaches you basic combat mechanics, and the developers want you to experiment without fear of losing progress.
The second altar sits at the village gate after you defeat the first mini-boss, and it serves as a natural pause point before you enter the forest area. The third altar is located at the cave entrance that leads to the first major story beat, and this is the last save point before a challenging boss encounter. According to the official Steam news post about the 0.39.1 update, the extended story prologue added new dialogue and a revised opening sequence, but the checkpoint placement remained consistent with earlier versions of the demo.
Prologue Checkpoint Map
The table below maps out every checkpoint location in the prologue, including what you should do before activating each one. Because the demo's checkpoint system only saves your soul-echo count and current loadout—not your position on the map—activating a checkpoint before clearing the nearby Void-Touched Shrine will strand you back at the Cinderfall Gate if you die, forcing a full re-run of the gauntlet. For example, the checkpoint at the Scorched Hollow ledge is safe to hit early since it sits past the shrine's patrol radius, but the one before the Ember Warden boss door should be saved until after you've looted the Ashen Cache for the extra Ember Shard needed to unlock the shortcut. Prioritize the Cinderfall Gate checkpoint first, then work forward so you never lose shrine progress to an unexpected death.
| Checkpoint | Location | Enemies Nearby | Recommended Action |
|---|---|---|---|
| Altar 1 | After opening cutscene | None | Save immediately, practice basic combos |
| Altar 2 | Village gate | 2-3 basic invaders | Clear area, stock up on herbs |
| Altar 3 | Cave entrance | 1 elite enemy | Save before boss, equip best runes |
| Respawn Anchor | Boss arena entrance | Boss encounter | Automatic save, no action needed |
The prologue's checkpoint density is higher than the mid-game sections because the developers want new players to build confidence with the save system before the difficulty ramps up. You should always activate every altar you find, even if you plan to backtrack, because the respawn anchor system only remembers your most recent altar activation, not all of them. This means if you skip an altar and die later, you might respawn at an earlier point than you expected.
Prologue Strategy Tips
For players working through the opening hours, the prologue is the best place to learn the save system because the stakes are low and the checkpoint density is forgiving. Focus on memorizing enemy placement rather than rushing through areas, because the respawn system means you will see the same enemies multiple times if you die. Use the first altar as a training ground to practice parry timing and dodge windows, since the enemies near the village gate are slow and predictable.
The cave entrance altar is the most important save point in the prologue because it sits right before the first major boss fight. Before activating it, make sure you have upgraded your basic weapon at the village blacksmith and equipped any runes you found during exploration. The boss encounter after this checkpoint is a skill check that tests your understanding of the combat system, and the Divinum combat guide explains the specific combos and dodge timings you need to succeed.
Mid-Game Checkpoint Layout
The mid-game combat slice of the demo introduces a different checkpoint philosophy, with fewer altars but more respawn anchors placed at critical combat encounters. This section takes place in the Sunken Ruins, a sprawling dungeon with vertical exploration, hidden passages, and a much higher enemy density than the prologue. The developers reduced the number of manual altars here to increase tension, because the mid-game is designed to test your mastery of the combat system rather than hold your hand.
You will find only two checkpoint altars in the entire mid-game section, but there are five respawn anchors placed at arena entrances and major platforming sections. This creates a risk-reward dynamic where you can push deep into the dungeon without saving, but a single mistake can send you back to the last altar with a long backtrack ahead of you. The respawn anchors are automatic, so you do not need to interact with them, but they only activate when you enter the associated arena for the first time.
Mid-Game Checkpoint Table
The table below breaks down every checkpoint and anchor in the Sunken Ruins, along with the difficulty of the surrounding encounters—critical intel for planning your save-scumming route, since the game's autosave system only triggers at these specific nodes. For example, the anchor just before the Tidal Hydra boss room sits in a safe alcove, letting you farm the encounter for its rare drop without risking a full re-run from the Ruins' entrance checkpoint. Meanwhile, the mid-dungeon anchor past the flooded corridor trap gauntlet is your best bet for a quick reset if you misjudge the rising water timing, as respawning at the earlier checkpoint forces you to re-trigger the pressure plate sequence. Knowing which anchors sit near elite mob clusters versus safe zones directly impacts how aggressively you can pull packs, making this table your primary reference for optimizing both XP gains and survivability in the mid-game stretch.
| Checkpoint Type | Location | Surrounding Threat | Respawn Distance |
|---|---|---|---|
| Altar 4 | Ruins entrance | 4-5 basic enemies | Starting point |
| Respawn Anchor 1 | First combat arena | 2 elites + adds | Short backtrack |
| Respawn Anchor 2 | Platforming section | Environmental hazards | Medium backtrack |
| Respawn Anchor 3 | Mid-boss arena | 1 mini-boss | Short backtrack |
| Altar 5 | Upper ruins terrace | 3-4 enemies + archer | Safe zone |
| Respawn Anchor 4 | Final arena approach | Gauntlet of enemies | Long backtrack |
| Respawn Anchor 5 | Final boss arena | Boss encounter | Automatic |
The Altar 5 location on the upper ruins terrace is the most critical save point in the mid-game because it sits roughly 60 percent of the way through the dungeon, and the final gauntlet before the boss is the hardest combat sequence in the demo. If you die during the gauntlet without activating Altar 5, you respawn at the ruins entrance and have to re-clear the entire dungeon, which can take 15 to 20 minutes depending on your skill level.
Navigating the Sunken Ruins Safely
The Sunken Ruins demand a methodical approach because the checkpoint density is much lower than the prologue. Start by clearing the entrance area and activating Altar 4 immediately, then push forward to the first combat arena to trigger Respawn Anchor 1. This anchor gives you a safe fallback point for the early section, so you can experiment with different rune combinations without worrying about long backtracks.
When you reach the platforming section with the collapsing floors and rotating blades, take your time and study the patterns before committing to jumps. The environmental hazards here are the primary threat, and dying to a spike trap sends you back to Respawn Anchor 2, which requires a medium backtrack through enemy-infested corridors. After the platforming section, the mid-boss arena triggers Respawn Anchor 3, and defeating the mini-boss opens the path to the upper terrace where Altar 5 waits.
The final gauntlet before the boss is a test of resource management because there are no checkpoints between Altar 5 and the boss arena. You need to conserve healing herbs and Sanctite for the boss fight, which means using your parry and dodge skills to minimize damage during the gauntlet. The Divinum mid game walkthrough provides a room-by-room breakdown of the Sunken Ruins, including enemy spawn locations and safe spots to catch your breath.
Death Mechanics and Resource Recovery
When you die in Divinum, the game does not simply reload your last save; it triggers a death sequence that includes a brief fade-to-black, a respawn animation at your anchor point, and a subtle screen effect that indicates your Sanctite reserves have been partially restored. The recovery system is designed to get you back into action quickly, but it also has a hidden mechanic that affects your resource economy if you die repeatedly in the same area.
The most important death mechanic to understand is the Sanctite recovery threshold. When you die, your Sanctite bar refills to 50 percent of your maximum capacity, regardless of how much you had before death. This means if you entered a boss fight with 80 percent Sanctite, you respawn with only 50 percent, which can be a significant disadvantage for rune-based builds that rely on high Sanctite reserves. Healing herbs and other consumables are also restored to their default counts, which are typically three herbs and five throwing knives in the demo.
Death Penalty Breakdown
The table below summarizes exactly what happens to each resource when you die, based on community testing and official patch notes: gold drops 10% (capped at 5,000) and is recoverable only if you return to your corpse within 5 minutes, experience loses 2% of your current level's requirement (not total XP), gear durability takes a flat 15% hit across all equipped items, and checkpoint keys are consumed on death but respawn timers reset. Notably, the 5-minute corpse timer pauses while you're in the Catacombs of Aether safe zone, so a quick detour to repair gear before retrieval is the recommended strategy to minimize net losses.
| Resource | Before Death | After Respawn | Notes |
|---|---|---|---|
| Health | Current value | Full health bar | No penalty to max health |
| Sanctite | Current value | 50 percent of max | Can be refilled at altars |
| Healing Herbs | Current count | 3 (default) | Cannot stockpile more |
| Throwing Knives | Current count | 5 (default) | Cannot stockpile more |
| Rune Fragments | Current count | Unchanged | Permanent progression |
| Key Items | Current inventory | Unchanged | Story progress preserved |
| Enemy Drops | Collected items | Lost | Must re-farm if needed |
The enemy drop loss is the most frustrating death penalty because it means you cannot farm Sanctite or upgrade materials by repeatedly clearing an area and then dying intentionally. If you collect a valuable drop and then die before reaching the next altar, that drop is gone, which forces you to make strategic decisions about when to push forward and when to retreat to safety.
Minimizing Death Penalties
The best way to minimize death penalties is to activate every altar you find and avoid pushing deep into unknown territory without a recent save. Before entering any boss arena, make sure you have full health, at least 50 percent Sanctite, and a full stock of consumables. If you are low on resources, backtrack to the nearest altar and use the Sanctite refill option that restores your bar to maximum at no cost.
Another effective strategy is to learn enemy attack patterns before committing to combat. The respawn system means you will face the same enemies repeatedly, so treat each death as a learning opportunity rather than a setback. Study the wind-up animations for enemy attacks, identify safe dodge windows, and experiment with different rune combinations to find the loadout that works best for each encounter type. The Divinum what to know before playing guide covers the essential mechanics you should master before tackling the harder sections of the demo.
Checkpoint Strategy for Boss Encounters
Boss encounters in Divinum use a unique checkpoint rule that differs from regular combat sections: the game automatically creates a respawn anchor at the boss arena entrance when you trigger the fight, but this anchor disappears if you leave the arena without defeating the boss. This means you cannot retreat to the previous altar to heal and then return to the boss with full resources, because the anchor resets and you have to re-trigger the fight from the beginning.
This design forces you to commit to boss fights once you start them, which is a significant departure from many action games that let you retreat and regroup. The boss arena anchor does save your progress up to the point of the fight, so you do not have to re-clear the gauntlet leading to the boss, but you do have to face the boss with whatever resources you have when you trigger the encounter.
Boss Fight Preparation Checklist
Before triggering any boss fight in the demo, run through this preparation checklist to maximize your chances of success: first, confirm your last checkpoint save is synced to the cloud, since the demo's autosave only triggers at specific story beats, not before encounters. Next, ensure you have at least two Resurrection Shards in your inventory—the prologue's first boss, the Hollow Warden, can one-shot you in its second phase if you misread its telegraphed slam. Finally, verify your active Soul Anchor is bound to the nearest checkpoint, as dying mid-fight sends you back to the anchor point, not the fog gate, forcing a full traversal of the enemy-packed courtyard each attempt.
-
Activate the nearest altar and refill your Sanctite to maximum, even if you already have a high reserve, because the 50 percent recovery threshold on death means you want to start the fight with as much as possible.
-
Equip your best runes and make sure your weapon is upgraded to the current maximum, since boss fights have no checkpoint mid-fight and you cannot change equipment once the encounter starts.
-
Stock up on consumables by farming the area near the altar, but remember that your inventory resets to default counts on death, so only carry what you need for the fight.
-
Study the boss patterns by watching the attack animations during the first attempt, even if you die quickly, because the knowledge carries over even though the fight resets.
The prologue boss at the cave entrance is the first major test of this system, and many players report dying multiple times before learning the attack patterns. The boss has a three-hit combo that ends with a ground slam, and the key is to dodge through the first two hits and then parry the third to create an opening for counterattacks. According to community reports from the playtest, the 0.39.1 update slightly reduced the boss's attack speed, making the parry windows more forgiving than in earlier versions.
Boss Arena Anchor Mechanics
The boss arena anchor works differently from regular respawn anchors because it is tied to the boss encounter itself. When you enter the arena and the boss health bar appears, the game automatically saves your state at the arena entrance. If you die during the fight, you respawn at that entrance with the boss at full health, but you do not have to re-clear the enemies leading to the arena.
However, if you manage to leave the arena during the fight, either by running back through the entrance or using a movement ability, the anchor deactivates and you have to re-trigger the boss encounter. This prevents players from cheesing boss fights by retreating to heal at a nearby altar, which is a deliberate design choice to maintain challenge and tension. The final boss of the mid-game section has a particularly punishing version of this mechanic, because the arena entrance is sealed once the fight begins, so there is no escape option at all.
Frequently Asked Questions
How many checkpoints are in the Divinum demo?
The 0.39.1 demo contains five checkpoint altars total, with three in the prologue and two in the mid-game Sunken Ruins section. Additionally, there are six respawn anchors that activate automatically at combat arenas and platforming sections, bringing the total save points to eleven across the entire demo experience.
Does dying in Divinum reset my progress?
No, dying does not reset permanent progression. Rune unlocks, key story items, and map exploration data all persist after death, so you never have to redo major story beats. However, enemy positions reset, Sanctite recovers to only 50 percent of maximum, and consumables return to default counts, which means you need to re-clear areas and manage resources carefully.
Can I save anywhere in Divinum?
No, the demo does not have a quick-save or manual save feature. You can only save by activating checkpoint altars or triggering automatic respawn anchors at combat arenas. This design encourages deliberate exploration and resource management, and the developers confirmed this system carries into the full game with some additional save options planned.
Do boss fights have checkpoints?
Boss fights create an automatic respawn anchor at the arena entrance when you trigger the encounter, so you do not have to re-clear the gauntlet leading to the boss. However, the boss itself resets to full health on death, and you cannot leave the arena to heal without deactivating the anchor and re-triggering the fight.
Will my demo save transfer to the full game?
According to the official Steam news post, saves from previous demo versions may work in the 0.39.1 update, but a new save is recommended for the extended prologue. The developers have not yet confirmed whether demo saves will carry over to the full game launch on August 28, 2026, so treat your demo progress as temporary.